Material Edit (and related tools in Modeling )

Tool summary :

Also see :

page 1 | contents | model > material > | model -- material | material tools | top


To edit one material (with Change Options ) :

Tip: If you edit one material at a time, you are given Change Options to simultaneously change all materials that have the same submaterial piecemark .

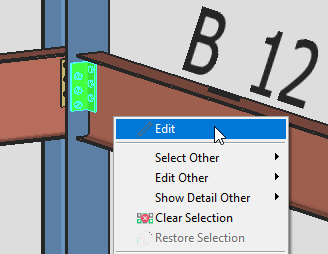
Method 1: Double-click ( selection filter = ' Material ' or ' Legacy Default ')

Hover a material with your mouse pointer ( ) until the material is highlighted, then double-click .
  • Double-click limits you to reviewing one material at a time.
  • When the selection filter is set to ' Default ', double-click does not edit a material that is a member main material or a connection material . To edit a member main material or a connection material, you can " Edit Other " or you can set the selection filter to ' Material ' or ' Legacy Selection Filter ' as in the example shown.
  • Highlighting as shown in this example occurs only when User and Site Options > Modeling > " Highlight surfaces " and " Show hidden lines in 3D wire frames " and " Show material dimension reference point " are checked ( ). The highlighting indicates that the material can be selected (one click) or edited (double-click).
  • Use " Edit Other " if you want to edit a material that is hidden by other materials in your view. Or use it to edit member main material or connection material when your section filter = ' Default '.

Method 2: " Edit Other " on the context menu to edit one material.

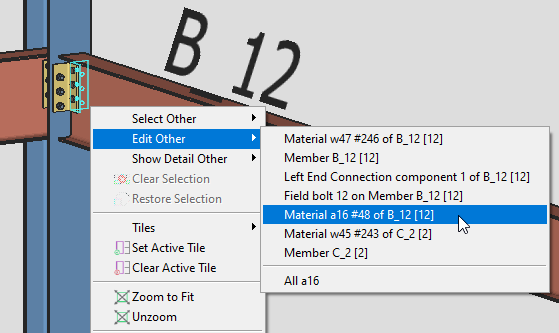
Hover a material with your mouse pointer ( ), right-click, choose ' Edit Other ' on the menu , then select the material that you want.
  • " Edit Other " limits you to editing one material at a time.
  • " Edit Other " is an excellent way to edit a connection material when the selection filter is ' Default '.
  • When you hover the listing of a material on the context menu, the actual material is highlighted in the model.
  • " Edit Other " can be used to select a material that is behind another material in your view. In the above example, the clip angle that is highlighted is hidden by the main material of B_7.
  • " Edit Other " can be used to edit a member main material or a connection material when the selection filter is set to ' Default '. In this example, " Material w4 of B_7 " and " Material w7 of C_1 " are member main materials, whereas " Material a1 of B_7 " and " Material a2 of B_7 " are connection materials.

Edit all materials under a mark

Method 3: " Edit Other " on the context menu.

Hover a material with your mouse pointer ( ), right-click, choose " Edit Other " on the menu , then select for editing multiple materials under a mark.
  • In the above example, only 8 of 10 of the material with the mark a3 can be edited. This is probably because a member that has the submaterial a3 attached to it has its " Model complete date " set or has a locked end.
  • The count 8/10 in the example above includes all incidences of a3 in the entire model, not just incidences of a3 in the current view.
  • " All xxx " (e.g., " All 2 w1 " or " All 6 w7 ") would edit all submaterials in the model that have that piecemark. It does not matter if the materials are in views other than your current view.

Multi-Edit of materials (various methods)

Method 4: Use the Model Tree (can also be used to preselect for Material Edit ).

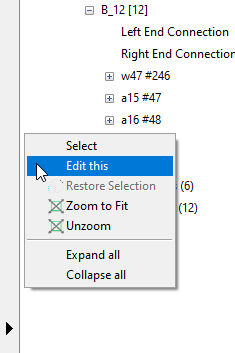
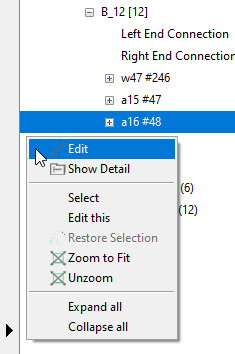
In the Model Tree , select the material that you want, then right-click and choose " Edit " on the context menu . In this example, you could double-click instead of right-click since only one material is selected.
  • To select multiple materials in the Model Tree , hold down Ctrl to select them, then right-click ( Menu ) and choose " Edit " (or invoke Material Edit ). As mentioned above, there are no Change Options when you do a multi-material edit.
  • As you hover the listing of an item in the Model Tree , that item is highlighted in the model. When you select an item in the Model Tree , that item is selected in the model.

Method 5: Material Edit , in-tool selection (filter independent)

1 . Invoke Material Edit .
2 . Select (left-click) a material. Optionally hold down Shift to select additional materials. Press the Enter key (or right-click and choose " OK " on the menu ). Note: You are only permitted to select materials -- even with the selection filter set to ' Bolts ', you can only select materials.
  • " Material Edit " can be used to edit one or more material.
  • You can reverse step 1 and step 2. The documentation refers to this as "preselection." Click here for more information.
  • The advantage of in-tool selection with Material Edit is that you don't have to mess with the selection filter . Filtering for materials is done automatically.
  • If you select multiple materials in step 1, you will not get any Change Options after you close the material edit window.

Method 6: Material Edit , preselection

Before selecting: Set the selection filter to ' Material ' if you want to include member main material or connection material in your selection. The ' Legacy Default ' filter also permits the selection of connection material. If you only include user added material in your selection, you can use the ' Default ' filter to select that material.

1 . Select (left-click) a material. Hold down the Shift key to Select+ additional materials. Press the Enter key (or right-click and choose " OK " on the menu ).
2 . Invoke Material Edit .
  • If materials selected in step 1 are not the same type, the User Created Standard Part Material window opens in step 3. This window appears, for example, when some of the selected materials are rolled sections and others are rectangular plates .
  • In step 1, if you select items other than materials (for example, members), those items will be removed from the selection when Material Edit is invoked in step 2.
  • If you multi-edit materials with the same submaterial mark but different index numbers , certain fields may have mixed entries on the edit window. If you change the mixed entries to a single entry, some of the edited materials may shift to a new location in the model, or cuts may move to the opposite end of a material. Click here for more information.
  • Be aware that the contents of a field are gray if there are mixed entries to that field. You can edit such fields.
  • The material edit window is read-only if any material of the multiple materials you are attempting to edit is part of a member that has its " Model completed " date set.

Special considerations when editing material :

Tip: To undo a Frame , Bend on Radius Point , Bend on Line , Cut Layout , Cut on Plane , or Material Fit , double-click the material then press " OK " on its edit window. The Material Change Options & Warning List opens. Press " OK " to undo the operation.
  • Materials classes include member main material , connection material and user-added material . The ' Default ' selection filter behaves differently with respect to materials of these different classes.
  • In order to select a material for editing, the member associated with the to-be-edited material must be displayed in one of the three solid forms .
  • When you edit one material, make a change and press " OK " on its edit window, the Material Change Options & Warning List opens. You can use that window to change one piece of material, or all like materials on the member, or all like materials on all like members with or without the same piecemark.
  • Any changes made by editing a material are reflected in the 3D model immediately, without your having to Process and Create Solids .
  • If you change settings other than the color on a connection material that is part of a system connection , the material is made into a user modified connection material .
  • The material edit window is read-only if the material you are attempting to edit is part of a member that has its " Model completed " date set.

page 1 | contents | model > material > | model -- material | material tools | top